Have you ever wondered why some chicken cutlets come out crispy and juicy when cooked in the oven, while others turn dry or soggy?
Table of Contents
Achieving perfectly cooked chicken cutlets in oven can sometimes seem tricky, especially when trying to balance crunchiness with tenderness.
buy now on Amazon
According to recent culinary studies, baking chicken cutlets in the oven is not only healthier but can also save up to 30% cooking time compared to traditional frying methods—yet many home cooks still struggle with the best approach.
In this post, you’ll discover exactly how to make chicken cutlets in oven with a simple 7-step method that guarantees mouthwatering, golden-brown results every time.
We’ll break down the process, ingredients, timing, and tips to help you master this classic dish with ease.
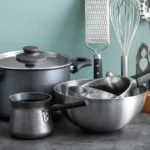
Ingredients List
Creating delicious chicken cutlets in oven starts with fresh, quality ingredients. Here’s what you’ll need:
- Chicken breast cutlets – thinly sliced, about 6-8 pieces
- Breadcrumbs – use panko for extra crunch or whole wheat for a healthier twist
- Grated Parmesan cheese – adds a savory depth and helps browning
- Eggs – 2 large, beaten to help the coating stick
- All-purpose flour – for dusting the chicken before coating
- Garlic powder – for subtle aromatic flavor
- Onion powder – adds a gentle sweetness
- Paprika – for mild smoky warmth and color
- Salt and black pepper – to taste
- Olive oil spray – to lightly coat cutlets for crispness
Substitution Tips:
- Swap chicken breast for turkey cutlets for a leaner protein option.
- Use gluten-free breadcrumbs if you need to avoid gluten.
- Nutritional yeast can replace Parmesan for a vegan alternative.
These ingredients combine to give your chicken cutlets a perfect balance of crispy texture and juicy tenderness when baked.
Timing
One of the biggest advantages of cooking chicken cutlets in oven is the time efficiency. Here’s the breakdown:
- Preparation time: 15 minutes
- Cooking time: 20 minutes
- Total time: 35 minutes
Compared to frying chicken cutlets, which can take 40-50 minutes including prep and cleanup, baking saves you around 20% of your cooking time. Plus, it reduces oil use, making it healthier and less messy.
Step-by-Step Instructions
Step 1: Prepare Your Workstation

Set up three shallow bowls: one with flour, one with beaten eggs, and one with the breadcrumb mixture combined with Parmesan, garlic powder, onion powder, paprika, salt, and pepper. This classic breading station makes the coating process smooth and even.
Step 2: Dry and Dust the Chicken Cutlets
Pat each chicken cutlet dry with paper towels. This step is crucial for helping the flour stick and ensuring a crispy crust. Lightly dust each piece with flour and shake off the excess.
Step 3: Dip into Eggs
Submerge the floured cutlet into the beaten eggs, coating both sides thoroughly. The egg acts as a glue for the breadcrumb coating.
Step 4: Coat with Breadcrumbs
Press the cutlet firmly into the breadcrumb mixture, ensuring every part is evenly covered. Use your hands to pat the crumbs down gently so they adhere well.
Step 5: Arrange on Baking Tray
Place the breaded cutlets on a baking tray lined with parchment paper. Give them enough space so air circulates, which helps crisping.
Step 6: Spray with Olive Oil
Lightly spray the tops of the cutlets with olive oil spray. This small amount of oil creates a golden crust without deep frying.
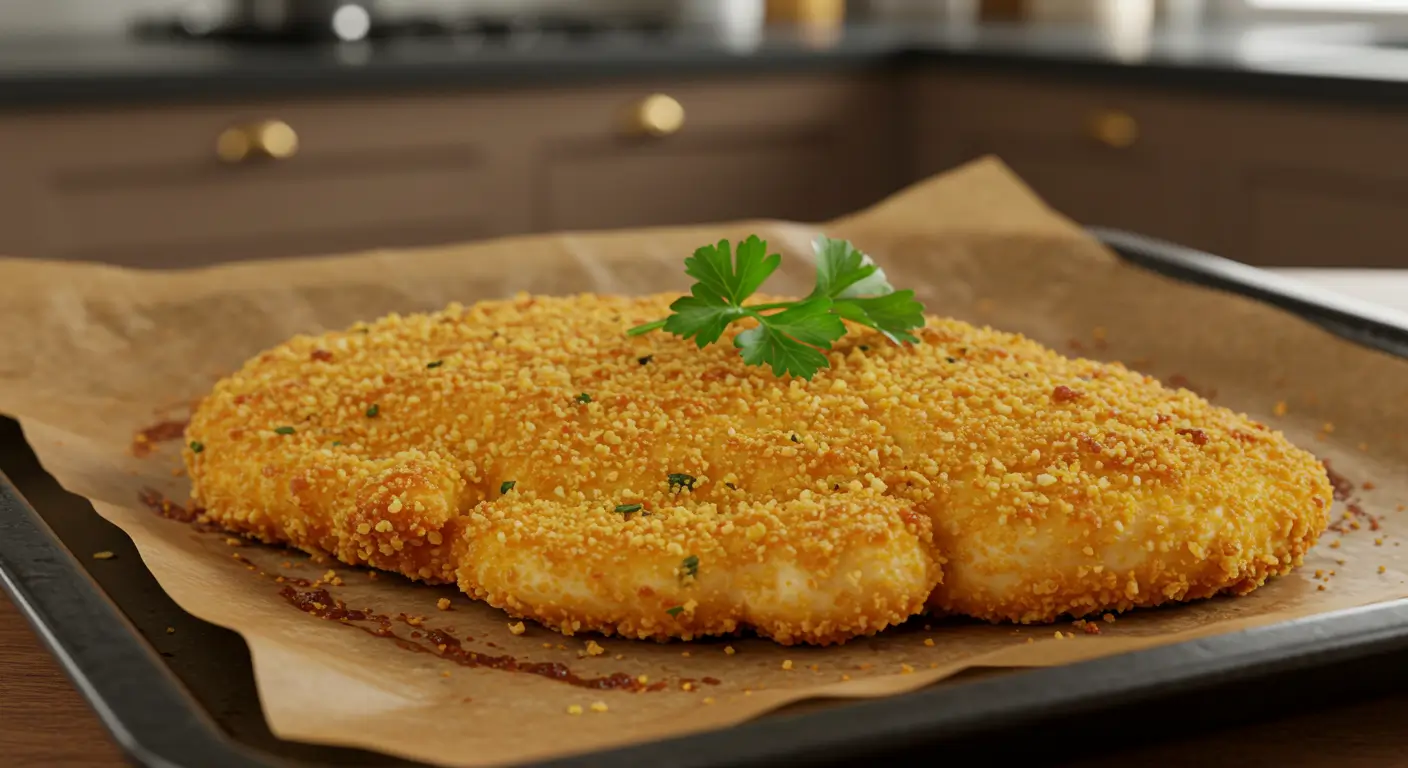
Step 7: Bake to Perfection
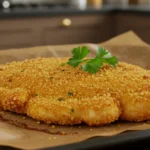
Bake in a preheated oven at 400°F (200°C) for 20 minutes, flipping halfway through. When done, the cutlets should be golden brown and reach an internal temperature of 165°F (74°C) for safety.
Pro Tip: For extra crunch, switch to broil for the last 2 minutes but watch carefully to prevent burning.
Nutritional Information
Enjoy your chicken cutlets guilt-free with this nutrition snapshot per serving (based on 1 cutlet):
- Calories: 220 kcal
- Protein: 30g
- Total Fat: 7g (mostly healthy fats from olive oil)
- Saturated Fat: 1.5g
- Carbohydrates: 10g
- Fiber: 1.5g
- Sodium: 350mg
Data sourced from USDA Food Database.
Healthier Alternatives for the Recipe
Want to make your chicken cutlets in oven even healthier? Try these modifications:
- Use almond meal or crushed cornflakes instead of breadcrumbs for lower carbs and added crunch.
- Omit cheese or substitute with reduced-fat cheese to cut saturated fat.
- Add ground flaxseed or chia seeds to the breadcrumb mix for omega-3 boost and fiber.
- Use skinless chicken thighs for richer flavor with slightly more fat but balanced nutrition.
- Bake on a wire rack over the tray to allow fat to drip away for less grease.
These swaps maintain flavor while adapting the recipe to different dietary goals like keto, low-carb, or gluten-free.
Serving Suggestions
Chicken cutlets in oven are wonderfully versatile! Here are some crowd-pleasing ways to serve:
- With a fresh side salad of mixed greens, cherry tomatoes, and a tangy vinaigrette.
- Over whole grain pasta tossed in olive oil, garlic, and fresh herbs for a hearty meal.
- With roasted vegetables like asparagus, carrots, or Brussels sprouts for added fiber and nutrients.
- Topped with homemade tomato sauce and mozzarella for a lighter chicken Parmesan twist.
- In sandwiches or wraps with crunchy lettuce and your favorite sauce for a quick lunch.
Personal tip: Sprinkle fresh parsley or basil on top before serving for a burst of color and aroma.
Common Mistakes to Avoid
Mastering chicken cutlets in oven means avoiding these frequent errors:
- Skipping the drying step: Moisture prevents the coating from sticking and results in soggy crusts.
- Overcrowding the baking tray: This traps steam and reduces crispiness; leave space between cutlets.
- Using too much oil: While olive oil spray is great, too much can make the crust greasy, not crispy.
- Not flipping the cutlets: Baking one side only causes uneven cooking and less crunch.
- Undercooking or overcooking: Use a meat thermometer to ensure perfect doneness (165°F internal).
Avoid these to get consistently crispy, juicy chicken cutlets.
Storing Tips for the Recipe
Leftovers can be just as delicious with proper storage:
- Cool cutlets completely before refrigerating in an airtight container.
- Store in the fridge for up to 3 days or freeze up to 1 month.
- To reheat, use an oven or air fryer at 350°F for 8-10 minutes to restore crispness (microwaving will make them soggy).
- Prep breadcrumb mixture and flour/egg bowls ahead of time for quicker weekday cooking.
Conclusion

Chicken cutlets in oven offer a simple, healthier, and time-saving way to enjoy a crispy, juicy classic dish.
By following these 7 easy steps, you’ll master a versatile recipe that’s perfect for weeknights or gatherings. Ready to try it? Share your feedback in the comments and subscribe for more delicious recipes and kitchen tips!
FAQs
Q1: Can I use frozen chicken cutlets for this recipe?
A: Yes, but thaw completely and pat dry before breading to ensure the coating sticks properly.
Q2: What if I don’t have olive oil spray?
A: Brush a small amount of olive oil or any mild vegetable oil evenly on the cutlets instead.
Q3: How do I keep the cutlets crispy after baking?
A: Serve immediately or reheat in an oven or air fryer. Avoid microwaving to prevent sogginess.
Q4: Can I prepare the cutlets ahead of time?
A: Yes, bread them and refrigerate for up to 24 hours before baking.
Q5: Is chicken breast better than thighs for this recipe?
A: Chicken breasts are leaner and cook evenly; thighs offer more flavor but are slightly higher in fat.